
Cartridge Heaters: Heater and Hole Fit
Cartridge Heaters can be a great choice for many applications that require heat. If used and controlled properly, cartridge heaters can provide a long-term solution for many conductive process heating applications.
When using a cartridge heater for your application, there are two key factors to ensure optimal results:
- Make sure the heater is sized correctly for the hole it’s intended for
- Make sure the surfaces of the heater and hole are clean
If you’re heating a solid mass, usually metal, you’ll need a hole in the material for a cartridge heater to be inserted into. Usually, it’s easy to find a heater for a hole size you have. If a hole measures 0.500” across its inside diameter (ID) you’ll want to use a 1/2” diameter cartridge heater. Cartridge heaters are slightly undersized, so they’ll fit into a standard hole size. In the case of a 1/2” diameter heater, it’s actually sized to 0.495” so it will fit into a hole with a small amount of clearance. It’s the same general rule for all TUTCO Cartridge heaters. It’s a lot easier to drill a 0.500” diameter hole using a standard drill bit or gun drill (due to availability) than a 0.505” diameter hole. Heaters are typically sized 0.005” smaller than the hole size for a good fit. The same rule applies to our metric heaters too.
Make sure the heater and inside of the hole are clean. This will enable the heater to be inserted into a hole without too much difficulty or excess force. Contamination will interfere with the heat transfer from the cartridge heater to the hole’s surface.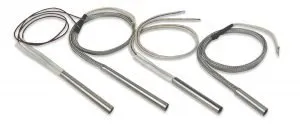
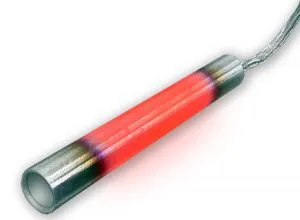
There are three types of heat transfer; conduction, convection and radiation. These will be discussed in another article, but for the time being please know that conduction is the best method of heat transfer for instances where you have a cartridge heater inserted into a hole. Conduction can be described as heat transfer between objects in physical contact.
If you have a heater that doesn’t fit into its hole well, as in, it’s a sloppy fit, then you’re asking for trouble. With a loose fit there will be a lot of convective heat transfer instead of conductive. That convection occurs because of the air surrounding the heater.
An inexpensive way to fill that air gap is to coat the heater with a few layers of Milk of Magnesia (yes, the stuff you can buy at any pharmacy). By applying thin layers of Milk of Magnesia and allowing it to dry between applications you
can build up the outside diameter of the heater so that it completely fills the hole when inserted. The coverage doesn’t have to be perfect since some of the material will shave off the heater when it’s inserted. That extra layer of material takes up the excess space and promotes good conduction.
Another material is Boron Nitride spray, available from a popular industrial distributor. Though more expensive, boron nitride is easy to apply (as a spray) and lubricates the heater very well for easy insertion.
 There is also a large variety of thermal transfer pastes that can be used to fill gaps, but with caution. Some of these pastes are conductive so try to avoid them. If that’s not possible, keep the paste away from the termination area of the heater, and make sure the temperature rating of the paste is appropriate for your application.