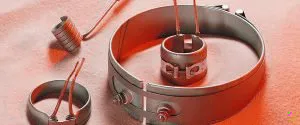
How to Correctly Install a Band Heater
When installing a band heater, it is important that it be well seated on a clean smooth surface and be tightened so that good heat transfer occurs between the heater and the body being heated. The more circular the object to be heated is, so much the bet- ter. Conductive heat transfer is the best type of heat transfer for a band heater, which relies on physical contact between the heater and body being heated. Any air gaps between the two will cause hot spots and are detrimental to the life of the heater. A small piece of built-up contamination can cause a lengthy air gap between the heater and the object to be heated. The higher the operating temperature, the more detrimental a poor fit can be.
 If the surface you’re installing the band heater around has pits or divots, it’s a good idea to apply a layer of high-temperature thermal transfer compound between the heater and what you’re heating, in order to aid with heat transfer over those uneven areas. The thermal transfer compound should be used sparingly and kept away from any termination areas and edges of the heater, due to the possible conductive nature of some of those transfer compounds. Heater efficiency is also negatively affected by a poorly fitting band heater.
General Procedure:
- The surface to be heated should be clean and smooth. Projections of baked-on contaminants or surface cavities may reduce heater life and decrease heater efficiency. Eliminate them as much as possible, especially for high operating temperatures.
- Seat the heater in its intended position.
- Securely and evenly tighten the heater clamping screws.
- Electrically connecting the heater.
- Energize the heater, allowing it to reach operating temperature.
- TURN OFF THE POWER TO THE HEATER and…Immediately retighten the clamping screws of the heater to take up elongation caused by any thermal expansion. Try to do this quickly while the heater is as hot as possible. Take care not to burn yourself. For safety reasons, don’t retighten the heater when it is energized. Just don’t do it.
- Energize the heater again and allow it to operate normally.
- There are applications where, because of the heater size, the clamping screw re-tightening operation should be repeated several times. Don’t forget to turn off the power to the heater for each retightening.
Notes:
If you have a torque wrench and the space in your heater installation location,
- 6-32 screws should be tightened to 15 in·lbs.
- 10-24 screws should be tightened to 75 in·lbs.
- 1/4-20 screws should be tightened to 100 in·lbs.
